Wednesday, July 29, 2015

Macau Trip #2: Venetian's Redemption!

Hey everyone!

Hope the week is going well - already half way through! This weekend Bryan and I went back to Macau and stayed at the Venetian again. I know, this sounds insane considering what happened to us last time, but we had a reason. After our first trip (when Bryan had money stolen right off of the table and the Venetian did not treat us well), Bryan wrote an e-mail to the Venetian in Macau. We were hoping to let them know that the way they reacted to the theft was unacceptable. We didn't expect much of a reply, if any, but we couldn't have been more wrong!

The head of gaming contacted Bryan via e-mail and expressed their immense apologizes for what happened and the way we were treated. They offered to give us a comped night at the Venetian (any night of the week), a comped dinner, and comped ferry tickets to and from Macau. So basically an entire weekend on them! We definitely took them up on this, and picked this past Saturday to stay. In addition to giving us all of these things to make up for the treatment, one of the two men who had stolen money came BACK to the casino and they caught him! Thankfully he was a complete idiot! Because of this, the Venetian said that in addition to our free items, Bryan would get the money back that was returned (not all of it, but at least it was part!).


So we were really looking forward to this weekend and wanted to make it better than the last visit - and it did not disappoint. The staff at the Venetian were incredibly nice to us. It seemed like it wasn't an unusual thing in Macau for money to be stolen, and so we were blown away by how they responded. And it just took a very perfectly worded e-mail from Bryan explaining everything - so he did a great job with that. When we arrived on Saturday morning, they let us use "VIP" check-in and go to our room around 10:00am, which was great. They told us to come back later in the day, and we would be able to claim our "lost and found item" aka the money that was stolen. When we went back to get it, they led us to security and when they confirmed Bryan's identity, he was given ALL of the stolen money back! We found out that the day before we got there, the second thief had returned - that's unbelievable timing!!!

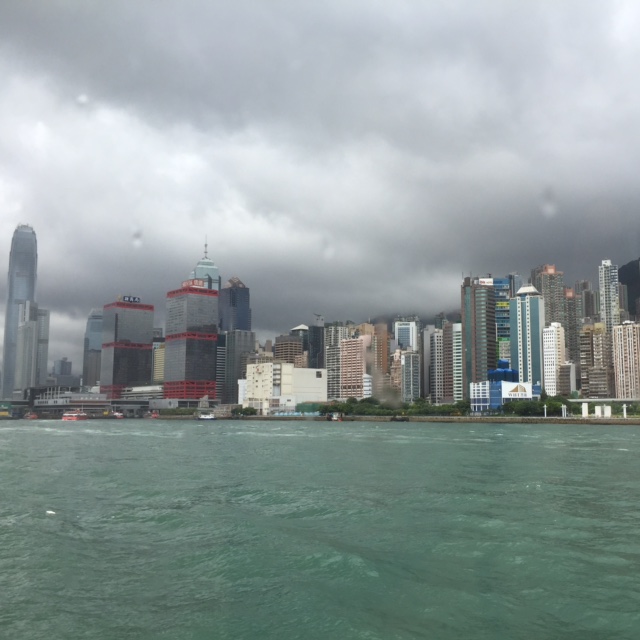
Rainy day view of HK from the ferry!

Going back to Macau also allowed us to try out a Portuguese restaurant that had come highly recommended to us, Albergue 1601. Macau was under Portuguese administration until 1999, so they have incredible Portuguese food. Not like we've had much of it before, but it was SO good! Since we had dinner plans through the Venetian (yummy Italian!), we went to the Portugese restaurant for lunch. So we ate such incredible food (and wine) on Saturday!


Beef Stew - YUMM
We also saw a show that was recommended to us - House of Dancing Water. It was entertaining, but not the best show we've seen and it was just so strange. There was some acrobatics, but mainly dancing (which was great), but the story didn't make any sense to us at all. We'll have to look up if there was a plot and what it was - seemed like a mix of random stories that didn't fit together. But definitely entertaining still :)

So overall - another amazing weekend with my wonderful husband!


Friday, July 24, 2015

A Simple, Delicious Raisin Bread Pudding in a Mug!

Happy Friday!

It's been pouring ALL week in Hong Kong, and even though it's hot and humid outside, I still felt like the rainy week needed a bread pudding (it's comforting and delicious - and the AC inside makes it easy to forget the temperatures outside). And when I say it's been pouring, I mean POURING all the time - barely letting up all week. I cannot believe how much rain there is, and it's only an "Amber" rain alert, which is one of the lowest levels. Amber means there's about 1.25 - 2 inches of rain/hour, Red is the next level at 2 - 3 inches/hour, and Black means the rain exceeds 3 inches/hour. This week it's been at Amber, and it seems like very heavy rain, so I can't imagine what Red or Black would look like. And honestly, I have no need to see that for myself :)

So coming back to the point of this blog - I made a bread pudding. I used Raisin and Cranberry day-old bread because it's what we had on hand, but any savory-type of bread would work well too. I think that sometimes bread pudding can be too mushy and it's definitely not a go-to dessert for me, but I think this single-serving, microwave-friendly option is a great use of day-old bread for a moist, warm dessert. (If you don't like the word moist, you should get past this - it's a very descriptive word so I have to use it! And in this capacity, moist is a good thing.)


So here's what you'll need:
  • 1 slice of bread of choice (or 2 slices if it's a smaller loaf)
  • 1 teaspoon butter, melted
  • 1/2 egg (or about 2 tablespoons egg beaters)
  • 1/3 cup milk (I use lactose-free, but you can use regular, almond, soy - whatever you prefer)
  • 2 tablespoons sugar
  • 1/8 teaspoon cinnamon
  • 1/8 teaspoon vanilla 

And here's how to make it:
  1. Bread bread into smaller pieces and put into a mug (No need to oil the mug).
  2. Melt the butter, and drizzle it over the bread.
  3. Mix the egg, milk, sugar, cinnamon, and vanilla in a separate bowl, stirring until combined. Then pour the mixture over the bread/butter. Using a spoon, press down on the bread until it's covered in the liquid and soaking it in.
  4. Bake for about 3 minutes in the microwave.
  5. Enjoy straight from the mug, or turn it out onto a plate and enjoy it there! 
#1 - pieces of bread in the mug

#3 - adding the liquid mixture to the bread

#3 - pressing the liquid into the bread

Enjoy straight from the mug!

Or on a plate!


Wednesday, July 22, 2015

Chocolate Chip Cookie In a Mug

Happy Wednesday!

This mid-week treat is a perfect, single-serving (or two if you're feeling generous enough to share) chocolate chip cookie - in a mug! It's a quick fix, and a delicious dessert. Chocolate chip cookies (and the dough) are one of my favorite desserts, and it's great to be able to make this recipe without making a whole batch of cookies.


First, for the ingredients:

  • 2 tablespoon butter, melted
  • 2 tablespoon granulated sugar
  • 2 tablespoon packed brown sugar
  • 1/4 egg (or 3/4 tablespoon egg beaters)
  • 1/4 teaspoon vanilla
  • 6 tablespoon all-purpose flour
  • 1/8 teaspoon baking powder
  • 1/4 teaspoon hot water
  • pinch of salt
  • small handful (about 1/4 cup) chocolate chips 
I love chocolate chip cookies because they use such simple ingredients that are so common in baking, so if you bake on a relatively normal basis, you probably have all of these things on hand! Once you do - you're ready to make this delicious treat.

Instructions:
  1. Melt butter in the microwave (in a microwave-safe bowl), and then stir in the sugar and brown sugar until dissolved and combined.
  2. Add in egg and vanilla, stir in.
  3. In a separate container, mix together the baking soda and hot water until dissolved. 
  4. Add in the baking soda mixture and salt to the main mixture.
  5. Pour in the flour, stirring until completely incorporated.
  6. Add in chocolate chips.
  7. Prepare a mug with vegetable oil. Put the cookie dough batter into the mug.
  8. Bake in microwave for about 1 1/2 minutes, checking it after 1 min - you don't want to over bake this! 1 1/2 minutes is the longest you'll want to go because cookies continue to bake after they're removed from the microwave/oven, so if it looks a little under done that's okay - it'll continue to cook a little more. Also, I like my cookies doughy, so I think under 1 1/2 minutes is perfect - but it's up to you! 
  9. Let cool slightly so it's not TOO hot, but personally cookies are best served warm - so enjoy!
#1 - melted butter and sugars

Cookie dough is ready (have a little bite -  it's all yours anyway!)

Hot and fresh, straight from the microwave!

Monday, July 20, 2015

8-Layer Miniature Chocolate Cake

So this 8-layer miniature chocolate cake is my best microwave-baked item so far, and I'm very excited about! I used my normal chocolate cake recipe, but made it smaller, and then turned it into a miniature layered cake. The whole cake is about 2" wide, 2" long, and 7-8" tall (so not miniature in height!). You could also make two shorter cakes with this recipe, up to you!


The frosting isn't as smooth as I like it to be, but it was awkward to frost such a small, narrow cake - so I'll work on that for next time, but the taste was delicious!

First, I made the cake and let it cool completely. Then I made the frosting, and cut and stacked the cake. I'll explain more in detail below.


Ingredients:

CAKE
  • 1/2 cup all purpose flour
  • 1/2 cup sugar
  • 3 tablespoon cocoa powder
  • 1/2 teaspoon baking powder
  • 3/8 teaspoon baking soda
  • 1/4 teaspoon salt
  • 1/4 teaspoon instant coffee granules (this enhances the chocolate flavor!)
  • 1/4 cup milk
  • 2 tablespoons vegetable oil
  • 1/2 egg (or 1 1/2 tablespoons egg beaters)
  • 1/2 teaspoon vanilla extract
  • 1/4 cup boiling water
 FROSTING
  • 4 tablespoon butter, melted
  • 3 tablespoon cocoa powder
  • 5/6 cup powdered sugar
  • 1 tablespoon + 1 teaspoon milk
  • 1/3 teaspoon vanilla
  • pinch of instant coffee granules
Instructions:

CAKE
  1. Mix the flour, sugar, cocoa powder, baking powder, baking soda, salt, and coffee granules in a bowl until combined.
  2. Mix the milk, vegetable oil, egg, vanilla (not water yet!) in a separate bowl
  3. Pour the wet ingredients into the dry ingredients and mix until combined. Then add the boiling water, and mix (carefully) until fully incorporated.
  4. Prepare a microwave-safe (preferably square) container with vegetable oil (this fits nicely into a 3 1/2 - 4 cup container)
  5. Pour cake batter into container, and place in microwave. Bake for 4-6 minutes (watch to make sure it's done). You can open the microwave to check on it, and then keep baking, but let it go for at least 3 minutes so it doesn't deflate too much.
  6. Let cool completely. 

Batter's ready!
 
FROSTING
  1. Melt butter in a bowl in the microwave. Once melted, add the cocoa powder and mix until combined.
  2. Add powdered sugar and mix until incorporated.
  3. Add milk, vanilla, and coffee granules. 
  4. Mix with whisk until combined and slightly lightens in color (incorporates air and makes frosting lighter and more delicious)
ASSEMBLY
  1. Once cool, flip the cake out of the baking container onto a flat surface. 
  2. Cut the cake into four equal squares, and then cut each square into two shorter squares (see photo below). You also have the option of just stacking the thicker four slices - I just like a lot of frosting on my cakes!
  3. Once you have eight squares (or four - your choice), you are ready for assembly! Place one square on a plate, frost, place the second square on top, frost, and repeat until you reach the last piece (alternating between slices of cake and frosting. 
  4. Now place the stack in the fridge and let cool for at least 30 minutes - this is important so it doesn't topple over or fall apart when frosting the outside.
  5. Once cooled, frost the outside, and you're done! YUM!
#1 - Flip cake onto flat surface
#2 - 4 squares, and cut each square in half this way (so each square is shorter)

#3 - Assemble Cake (frosting between each cake layer). Then cool (#4) before frosting (#5).

    Sunday, July 19, 2015

    Our Weekend in Taipei!

    Happy Monday!

    This weekend, Bryan and I flew to Taiwan and spent 2 nights in Taipei! It was a short, 1.5 hour flight away from Hong Kong, and it was amazing to be able to see another country.

    Before the actual weekend started, we were able to see two of our friends (a couple) who we hadn't seen in over a year! About a year ago, they moved from California to Singapore for work, and we were happy they were in Hong Kong late last week. Bryan works with Todd, so Nicole and I were able to spend the day exploring Hong Kong. She found a tea tasting experience that was delicious and fun, and then we went to dinner and met up with the boys in LKF (area with many bars) after that for some drinks. It was a really fun day!

    Below is a collage of the tea tasting - the top left is tea that started out as a ball and blossomed into this beautiful flower! And it was delicious :) Almost too beautiful to drink. We also tried rose honey, which was surprisingly good. I don't usually like floral-tasting things or honey, but apparently I like the combo.

    Tea Time!
    On Friday night, Bryan and I went straight to the airport after he got off work. It's super easy from where he works because there is an "Airport Express" tram that takes you right to the airport from the IFC (international financial center) in under 30 minutes. When we got to the airport and got our tickets, the machine also printed out passes to the lounge for us to go to after security, which was a nice surprise!


    Our flight was delayed, so it was great to have a comfortable place to hang out while we waited. Since our plane ended up being a few hours delayed in total, we got into Taipei after 1:00am, so we went straight to the hotel and went to sleep. At 9:00am on Saturday, "A Taipei Tour" picked us up (which we had pre-booked) for a day tour in Taipei. It was a great way to see Taipei in one day, and we saw a lot of different things - Longshan Temple, Chiang Kai-Shek Memorial Hall, National Palace Museum, Presidential Office Building, Taipei 101 + a dimsum lunch, Yangwingshan National Park, Beitou Hot Springs, Danshui River old street, and Shilin Night Market. It was great to be able to see so much, but it was a bit too rushed. We're glad we got to see most of these places, but I think it would've been better if the tour company picked a few of the best highlights and spent more time at those. We spent the most time at lunch, the museum, and the Danshui River old street. I don't know if you need much more time at many of these places, but fitting in the areas in the mountainous parts of Taiwan made it so that we didn't actually stay at those places for that long. With that said, we were still able to see beautiful views from the bus, so in the end, it was worth it to go up to the mountains. I also think our group made a difference. Some stayed on the bus at multiple stops, and they were constantly ready to just move on to the next stop. Bryan and I would've stayed at some longer by ourselves, but we moved with the group. Overall we did have a great day!

    The Danshui River old street and the Shilin Night Market were very interesting to see, just because they're so unique to this area of the world (at least compared to the US). There is so much street food and so many things you can buy, and it was just very interesting to see it. We tried a few samples of things, but mainly just looked area, and didn't actually purchase anything. I think that's pretty rare here, but we just wanted to see it all. And, as usual, it was just so nice to be able to spend the entire day with Bryan - always wonderful!

    Memorial Hall, Taipei 101, dim sum, Night Market, and Hot Springs
    When we were at lunch, we had some extra time to walk around the indoor market in the Taipei 101 building (which is the tall building in the photo above). While walking around, we found a fruit called a "durian". We had heard of this fruit on the Travel Channel from Andrew Zimmern's show. He's someone who tries a lot of different types of foods (mainly ones that look nasty) and he likes almost everything. He hates the durian. He described it's smell and taste, and so when we saw it, we had to try it. This may sound like the opposite of how we should have reacted, but we were just too curious!


    I think our faces are pretty revealing - it was nasty. We smelled it first, straight from the fruit, and thought "oh, that's not too bad", but once it's out of the fruit, the smell is SO much stronger! We could smell it through a plastic bag in a plastic container that was sealed. We each had a tiny bite, but it tasted like rotten, mushy mango with a horrible aftertaste. I honestly think the smell was probably worse than the taste - we could smell it from many feet away, but the aftertaste lingered on for a while. Even after drinking our Coke Zero to make it go away. Needless to say, one taste was more than enough.


    Tuesday, July 14, 2015

    Stop-and-make-immediately Cinnamon Rolls!


    Hey everyone!

    So cinnamon rolls are something that almost everyone likes - at least, I've never met anyone who doesn't like a cinnamon roll. The problem is that they're always so huge in the stores, and they take a long time to make at home - until now. These are tiny little cinnamon rolls (1" wide, 1/2" tall), and they can be made in about 20 minutes or less (depending on how long it takes you to mix the ingredients).

    Don't lie, you want to make those right now! All you need are the following ingredients, a microwave, a bowl, and a microwavable container - I used a sandwich-sized one.

    So here are the ingredients:


    Dough*:

    • 1/3 cup + 1-2 tablespoons all purpose flour
    • 1 teaspoon sugar 
    • 2/3 teaspoon baking powder
    • 1/6 teaspoon salt
    • 1 1/2 tablespoon butter
    • 2 tablespoon milk
    *Since this dough doesn't have yeast, and doesn't have to rise, it won't be as flaky as a normal cinnamon roll - it's more doughy, but still delicious.

    Filling:
    • 1 tablespoon butter, melted
    • 2.5 tablespoon brown sugar
    • 1/2 teaspoon ground cinnamon 
    Glaze:
    • 2.5 tablespoon powdered sugar
    • 2/3 teaspoon milk
    • small pinch of ground cinnamon

    And now that you're ready to get started, here are the directions:
    1.  Start with the dough. Mix 1/3 cup flour, sugar, baking powder, and salt in a bowl. Add in butter (cut into small pieces) and massage it in until the butter is incorporated and pea-sized or smaller. Then, add the milk (1 tablespoon at a time). At this point, you want a dough that's a little bit sticky, but not enough to stick to your hands. You want to be able to roll it out, so if there's too much liquid, add 1 tablespoon of flour at a time to reach desired consistency. If too dry, add a little bit more milk. 
    2. Now roll the dough out into a small rectangle, about 1/4" thick. 
    3. Prepare the filling by mixing the ingredients together. Then place the filling on top of the rolled out dough.
    4. Roll the dough into a tube, and cut into 7-8 pieces, about 1/2" thick each.
    5. Prepare your container with cooking spray or a light coat of vegetable oil. Place the cinnamon rolls into the container.
    6. Bake in the microwave for 2 minutes (don't want to over-bake these!)
    7. While it bakes, prepare the glaze by mixing the ingredients together. 
    8. When the cinnamon rolls are still hot, pour the glaze over the top, and enjoy!
    Filling is on the dough! (#2 and #3)

    Rolled up, and ready to cut (#4)

    All ready to go in the microwave
    Out of the microwave, and ready for the glaze

    And immediately ready to enjoy!